| Accessories | | Product Summary |
|---|
The R-Go Caparo 4 D2 Dual Monitor Arm from R-Go Tools is an articulating (gas-cylinder) desk-clamp arm for two monitors. It has a dual hinged arms for horizontal extension from 8" to 23" (20 - 59 cm) with a height range of 6.3" to 25.2" (16 - 64 cm), a tilt range of 40°, rotation of 360°, and swivel range of 180°. The monitors mount to the arms using a 75x75 mm and 100x100 mm VESA plate. The Caparo 4 D2 can handle monitor weights from 6.6 to 19.8 lbs (3 - 9 kg).
The Caparo 4 D2 Dual Monitor Arm uses three "Smart" technologies in its design. The Smart Lock feature allows attachment of the monitor to the arm with one click. The Smart Connect feature connects all modules together without tools and in an intuitive way. The Smart Stop feature secures the rotation of the arm in a certain direction with the rotation stop. In addition, the arm is certified to be 100% circular*.
Note: "100% circular" means modules can be re-used with a life-time take back guarantee, the product is certified 100% recyclable, 75% of the aluminum is recyled raw material, materials are easily separable using smart-fits, and product boxing is 100% carton packaging material. Due to the cost of returning these to the manufacturer it may be more practical to direct them to a local recycler. | | Ergonomic Benefits |
|---|
Reduces the Risk of Neck Injury A primary risk factor for injury in an office setting is an improperly positioned monitor. A good articulating monitor arm will help eliminate that problem by allowing height adjustment for the monitor relative to the desk surface on which the keyboard and mouse are situated. The Caparo monitor arm provides 16" of vertical adjustment and 24" of horizontal adjustment, making it easier to adjust the monitor height to a position that is optimal while sitting. SPECIAL NOTE FOR THOSE WITH MULTIFOCAL OR PROGRESSIVE LENSES: Since those with multifocal lenses rely on the lower portion of their glasses for "near" vision, they generally require the monitor to be positioned at a much lower height vertically than those with no glasses or who only have single-vision lenses. Failing to address this will force individuals into an uncomfortable extension at the neck, as they tilt their head back in order to be able to view out of the lower portion of their corrective eyewear. Those who employ multifocal lenses may be able to position their monitors far enough away for best viewing at the intermediate range. Doing so can mitigate the neck extension as it may eliminate the need to tilt the head.
Offers Low-Force Adjustment The Caparo uses a gas spring to counterbalance the effects of gravity on the monitor, allowing individuals to adjust it both upwards and downwards using their fingertips. This ease of adjustment (regardless of whether the monitor is fully extended or contracted) removes a potential obstacle for those who would otherwise be unwilling to adjust their monitor as needed. This technology is superior to mechanical spring mechanisms which cannot provide consistent linear counterbalance through the full range of the arm.
Increases Desktop Space By raising the monitor above the worksurface, space on the desktop is made available for storage and other office accessories (phones, calculators, etc.).
Optimizes the Viewing Angle Monitors are best viewed when the face of the monitor is parallel to the face. The ideal angle of the monitor is not necessarily perpendicular to the desk in all cases, however, since some may feel more comfortable slightly tilting their head forward, especially when working in a standing position. Note: As the head tilts forward, there is typically increased weight and load placed on the muscles in the neck, and as such any flexion should be limited to no more than 10 degrees.
Eliminates Glare Adjusting the vertical and horizontal angle of the monitor will allow individuals to eliminate glare when viewing the monitor.
Helps Maintain Good Posture When Seated When a monitor is too low or high, people may choose to adjust the position of their torso instead of, or in addition to, their neck in an attempt to accommodate incorrect monitor height. This will often result in adopting a leaning forward posture, shifting them out of the ideal “S” posture in the spine, and losing any potential lumbar support that their chair provides. The correct monitor height may prevent this risk factor from arising.
Accommodates Working in Different Postures Movement is important! When a worker changes their posture between standing, lean-into, sitting, or leaning back in their chair the optimum position for their monitor(s) will change accordingly. The wide range of movement which the Caparo provides will accommodate these new parameters, enabling them to correctly position their monitors for optimum viewing from any chosen posture.
Allows Multiple Individuals to Share Information Easily In some office environments workers need to share screen information with clients and/or co-workers, but this can be awkward or inconvenient when the monitor is on a stand and cannot easily be moved or oriented towards another person, even one sitting at the same desk. An articulating arm can easily solve this problem because the screen can be swivelled to face even someone on the opposite side of a desk when they need to view the screen.
| | Features |
|---|
- Gas Spring: The gas cylinder completely counterbalances the weight of the monitor and arm, counteracting the effects of gravity.
- Vertical Range: The Caparo can be used to position a monitor to achieve maximum heights ranging from 6.3" to 25.2" (16 - 64 cm) above the mounting point. Using the gas lift arm the monitor can be adjusted through an 11" vertical range from any chosen height along the mounting pole. See the Table of Sit-Stand Heights to find approximate height settings for both desk and monitor.
- Horizontal Extension: The Caparo provides offers up to 23" of forward extension from the mounting point.
- Monitor Tilter: The monitor tilter mechanism provides 40° of tilt adjustment at the "head" or "wrist" of the arm.
- Monitor Rotation: The monitor tilter mechanism provides 360° of monitor rotation allowing rotation from landscape to portrait orientation, even upside down (if required).
- Arm Rotates at 3 Joints: The Caparo provides 360° of rotation at two joints, the post and the hinge or "elbow". The Smart system permits rotation in only one direction. At the monitor mount the rotation is limited to just 180° (90° to the left and right). This yields almost limitless flexibility and articulating capabilities for monitor positioning.
- Compact Storage: When desired, the arm folds up to occupy approximately 5" of space, freeing up the desk for other activities.
- Cable Management: Cable guides prevent cables from dragging on the desk. The Smart Stop system ensure that cables do not get wound up by preventing continuous rotating in one direction.
| | Images and Multimedia |
|---|

R-Go Caparo 4 D2 Dual Monitor Arm
| 
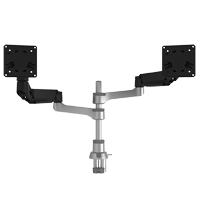
R-Go Caparo 4 D2 Dual Monitor Arm - Rear View
| 
R-Go Caparo 4 D2 Dual Monitor Arm - Articulation
| 
R-Go Caparo 4 D2 Dual Monitor Arm - In Use
| |
| | Technical Specifications |
|---|
- Weight Capacity (per arm): 6.6 to 19.8 lbs (3 - 9 kg)
- Height Range (up to VESA centre): 6.3" to 25.1" (16 - 64 cm)
Monitor can be adjusted through an 11" vertical range from any point along the mounting pole. - Horizontal Reach: 8" to 23" (20 - 59 cm)
- Screen Capacity: up to 26" diagonal per screen
- Tilt: 40°
- Rotation: 360°
- Swivel: 180°
- Weight: 10 lbs (4.58 kg)
- VESA Compatible: 75x75 mm and 100x100 mm
- Mount Options: Desk clamp, grommet
- Package Contents: R-Go Caparo 4 D2 Dual Monitor Arm, Manual
| | Usage Tips |
|---|
- Choose an Arm with an Appropriate Weight Capacity – Before purchasing your monitor arm, investigate the weight capacity of the arm so that the weight of your monitors are ideally somewhere in the middle of that range. For example, the weight capacity of the Caparo is 6.6 to 19.8 lbs. so the midrange weight is 13.2 lbs. The closer to the midrange is the better. If you have not yet purchased your monitors or a monitor arm, research your options and choose an arm that will work for the monitor you want. Obviously, if you already have an arm and not the monitor, you will have to choose a monitor with an appropriate weight without its stand included. In addition, you will have to choose a monitor that can be mounted on an arm with an acceptable hole pattern for mounting with screws. For the Caparo, the monitors must have a hole pattern in the back side which is 75 mm x 75 mm or 100 mm x 100 mm square. Otherwise, you may require a special adapter plate.
- Select the Optimal Mounting Location – The Caparo can be configured to clamp mount over the edge or through a grommet. These will work for most applications. You may want to roughly position the mount in different locations at first to get an idea of where the movement of the arm is optimal and then decide on which mounting option works best at that location.
- Adjust the Counterbalance Mechanism with Monitors Attached – After the Caparo has been mounted in its optimal position, you will need to attach the monitors so that you can properly adjust the counterbalance mechanism. This will ensure that the monitor moves up or down effortlessly. Follow the manufacturer's instructions on how to do this. After mounting, calibrating the counterbalance is the most critical step in installing your monitor arm properly. Once done, you are almost ready to use the monitor arm (see next tip).
- Set the Height, Angle, and Distance - Once your monitor arms has been installed and calibrated properly, you are ready to set it in the optimal position. In terms of ergonomic principles, the optimal position can vary, but there are definitely improper ways to set your monitor. Learn More About Optimizing Monitor Position.
| | Models |
|---|
| For related products, visit our online product listing. | | Model # | Description | TD Synnex SKU |
|---|
| RGOVLCA4TWSI | R-GO Caparo 4 D2 Monitor Arm, Black-Silver | |
|
|